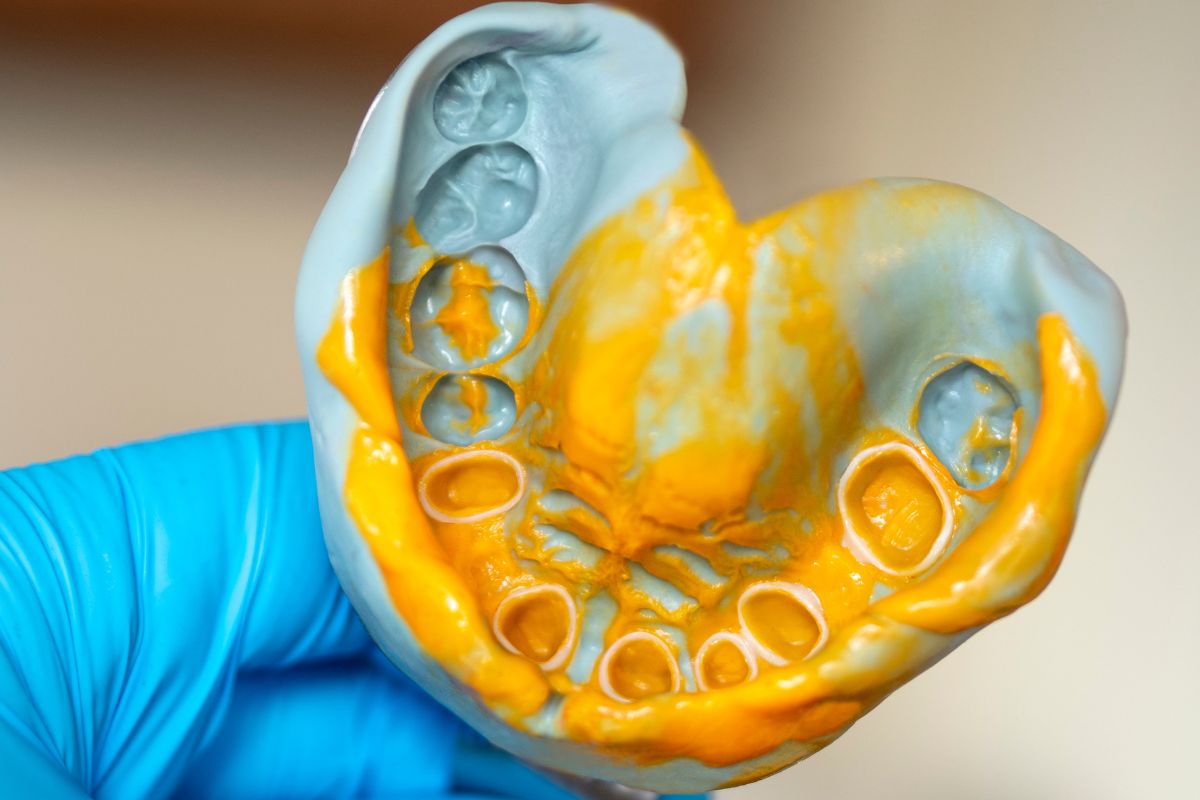
A dental impression is the taking of a “negative” picture of your teeth, your gums, and the surrounding area of your mouth. Like when you press something into wet clay and it leaves an impression, a dentist presses a special material into your mouth and creates a exact replica of the shape inside your mouth. This replica is known as an “impression.”
A lab creates a plaster model of your teeth (also referred to as a “cast” or “study model”) from these impressions. Your plaster model is a “positive” representation of your teeth and gums and is used by dentists for a wide variety of treatments including:
- Making crowns and bridges.
- Making dentures.
- Making orthodontic appliances (braces to straighten teeth).
- Planning implants.
- Creating protective mouthguard.
- And other restorative work.
Simply put, a dental impression is a 3D blueprint of your mouth, based on which precisely fitting appliances are made for your dental treatment.
Techniques for Taking Dental Impressions
There are mainly two types of techniques used to take dental impressions:
1. Conventional Impression Technique
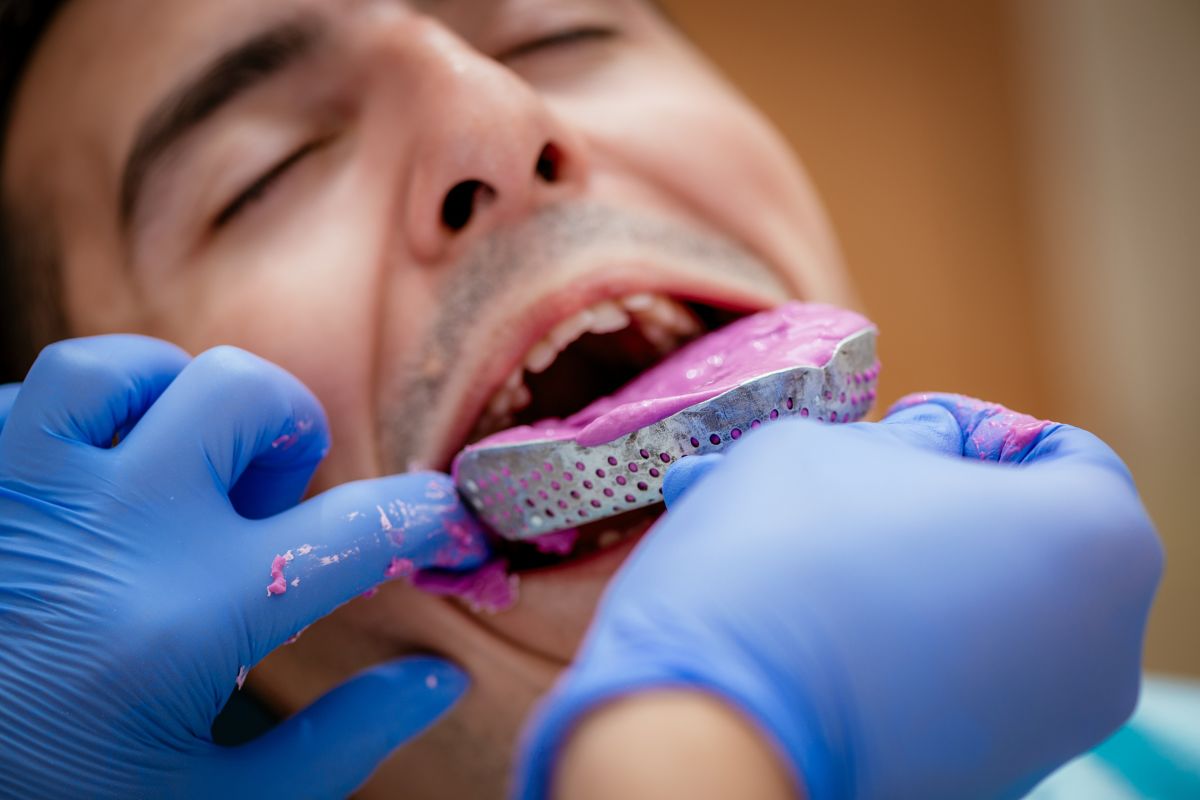
This is the most common and oldest method. It uses an impression tray and impression material.
Impression Tray: This is U-shaped tool that is molded into the shape of your dental arch. It is usually plastic or metal and comes in different sizes to fit the patient’s mouth precisely.
Impression Material: This is typically in the shape of a paste and is charged into a tray. In the mouth and pressed against the teeth, it sets hard and becomes rubbery within a few minutes, and records a precise impression of your gums and teeth.
Typical materials used:
Alginate: This is the most widely used material since it is inexpensive, quick, and simple. It is created from a combination of water and powder and hardens fast. Its precision, however, might be lower than other materials, and an immediate plaster model must be constructed once it hardens.
Polyvinyl Siloxane (PVS): This is a precision rubber-based material. It produces highly detailed impressions and will not move even after setting. It is used for custom treatments like crowns, bridges, and implants. It is slightly longer to set in the mouth.
Polyether: Another high-accuracy material with similar properties to PVS. Also provides very precise impressions and works efficiently under humid conditions. It sets in less time than PVS and has slightly greater stiffness.
2. Digital Impression Technique
The digital dental impression is a technology-driven and contemporary technique which has minimized the demand for conventional impressions.
How it works: This technique involves capturing a direct 3D digital image of your teeth and gums with a small handheld scanner (an intraoral scanner). The scanner is rotated in the mouth and captures thousands of images which are immediately assembled on a computer screen to produce a precise 3D model of your mouth.
Advantages:
- More comfortable: The patient never gets the taste or sensation of choking that comes with conventional impression material.
- Faster: The process of scanning is extremely quick, and one sees results immediately.
- More accurate: Digital scans tend to be more accurate than conventional impressions, resulting in more precision in treatment.
- Environmentally friendly: There is no wastage of material.
- Data storage and sharing: The digital files are readily storable and shareable with labs or other experts.
Disadvantages:
- Costly: The digital scanner and associated software may be pricey.
- Learning curve: Dentists and dental staff must learn to operate digital systems.
Procedure for Taking Dental Impressions
Regardless of whether the procedure is old-fashioned or digital, there are a few fundamental steps to the impression process:
Traditional Impression Procedure
- Preparation: The dentist will look in your mouth and choose an appropriately sized impression tray. At times, an adhesive is applied to the tray to aid the material in sticking well.
- Material Mixing: The material for the impression (like alginate or PVS) is mixed with chemicals or water to form a paste. This has to be done very fast as the material sets fast.
- Tray Filling: The tray is filled with the material that has been mixed.
- Placement: The dentist will gently place the tray inside your mouth and push it against your teeth. You may feel pressure during this period.
- Permitting to Set: You will have to wait a few minutes (varies depending on the type of material) to permit the material to set fully. In this time, you must not move your mouth.
- Removal of Tray: Once the material is fully set and hardened, the dentist will have to remove the tray from your mouth.
- Impression Check: The quality of the impression captured will be checked by the dentist. If not flawless, the process could be done again.
- Model Creation: The impression is forwarded to a dental laboratory, or an exact model of the tooth is created within the clinic by filling it with a plaster or stone material.
Digital Impression Process
- Preparation: Your teeth are prepared in your mouth by the dentist for the scan, occasionally by a thin layer of powder (if the scanner needs it).
- Scanning: The dentist will place a small intraoral scanner in your mouth. The scanner records thousands of digital images of teeth and gum surfaces.
- Real-time model: These photographs are sewn together in real time on a computer screen to give you a 3D model of your mouth. A model of your teeth can also be viewed on the screen.
- Verification: The dentist will verify the model on the computer to ensure that it is correct and that all the detail required has been recorded accurately. Should there be any faults, these may be corrected straight away.
- Data transmission: The final digital model file is electronically transmitted to the dental laboratory, where secondary procedures (e.g., the production of a crown through CAD/CAM) are initiated.
Overall Comparison Between Conventional and Digital Impressions
Both conventional and digital approaches to making dental impressions have their own strengths and weaknesses that affect clinical decisions.
In traditional impressions, physical impressions of a patient’s mouth are taken by a dentist by filling a tray with an impression material in paste form (i.e., alginate or PVS). It has been a stalwart in dental practice for decades due to the fact that it is comparatively cheap and can be easily applied in any clinical practice.
Despite that, patients usually do not like this approach; the unusual flavor of the material, gag reflex, or pressure caused by inserting the tray into the mouth are frequent complaints. Also, there is a time required for the material to set, and some physical deformation of the impression may occur during or after it, which can influence the precision of the final restoration. It also has time to courier the physical impression to the lab and make a plaster model of it, and this is also factored in terms of couriering cost.
On the other hand, digital impressions utilize a small, intraoral handheld scanner to take a 3D impression of the tooth directly onto a computer. This is much more patient-friendly because there is nothing to taste or choke on. The scanning procedure is very quick, and the 3D representation of the mouth is shown immediately on the computer screen where one can verify its accuracy and correct it directly if incorrect. Such high precision, lack of material-related distortions, and real-time feedback create a more precise fit of the dental restoration.
Additionally, the digital files are transmitted to the dental laboratory electronically, which saves time and money and enhances the workflow. Nevertheless, the cost of setting up initial equipment like a digital scanner and associated software is significantly higher than the conventional method, making it prohibitive for smaller clinics. Therefore, the selection between the two methods depends on the clinic’s capacity to pay, patient convenience priority, as well as accuracy and efficiency needs.